These low carb 3-ingredient salami cream cheese pinwheels are my go-to emergency appetizer—the kind you throw together when guests show up 20 minutes early and you’re still in yoga pants. My brother actually came up with this combo during a family get-together; he started rolling salami slices with cream cheese and chives while people were walking in the door, and they were the first thing to vanish from the snack table. They’re salty, creamy, and a little bit fancy-looking without any actual effort, and because they’re naturally low carb and gluten-free, they work for almost everyone at the party.
Serve these pinwheels piled onto a simple white plate or platter so the red salami, white cream cheese, and green chives really pop. They pair perfectly with a crunchy veggie tray (cucumbers, celery, bell peppers), olives, and a simple green salad for a light spread. For drinks, they go well with sparkling water, a crisp white wine, or light beer. If you’re doing a full appetizer table, set them next to nuts, cheese cubes, and pork rinds or seed crackers to keep the whole spread low carb and easy to graze on.
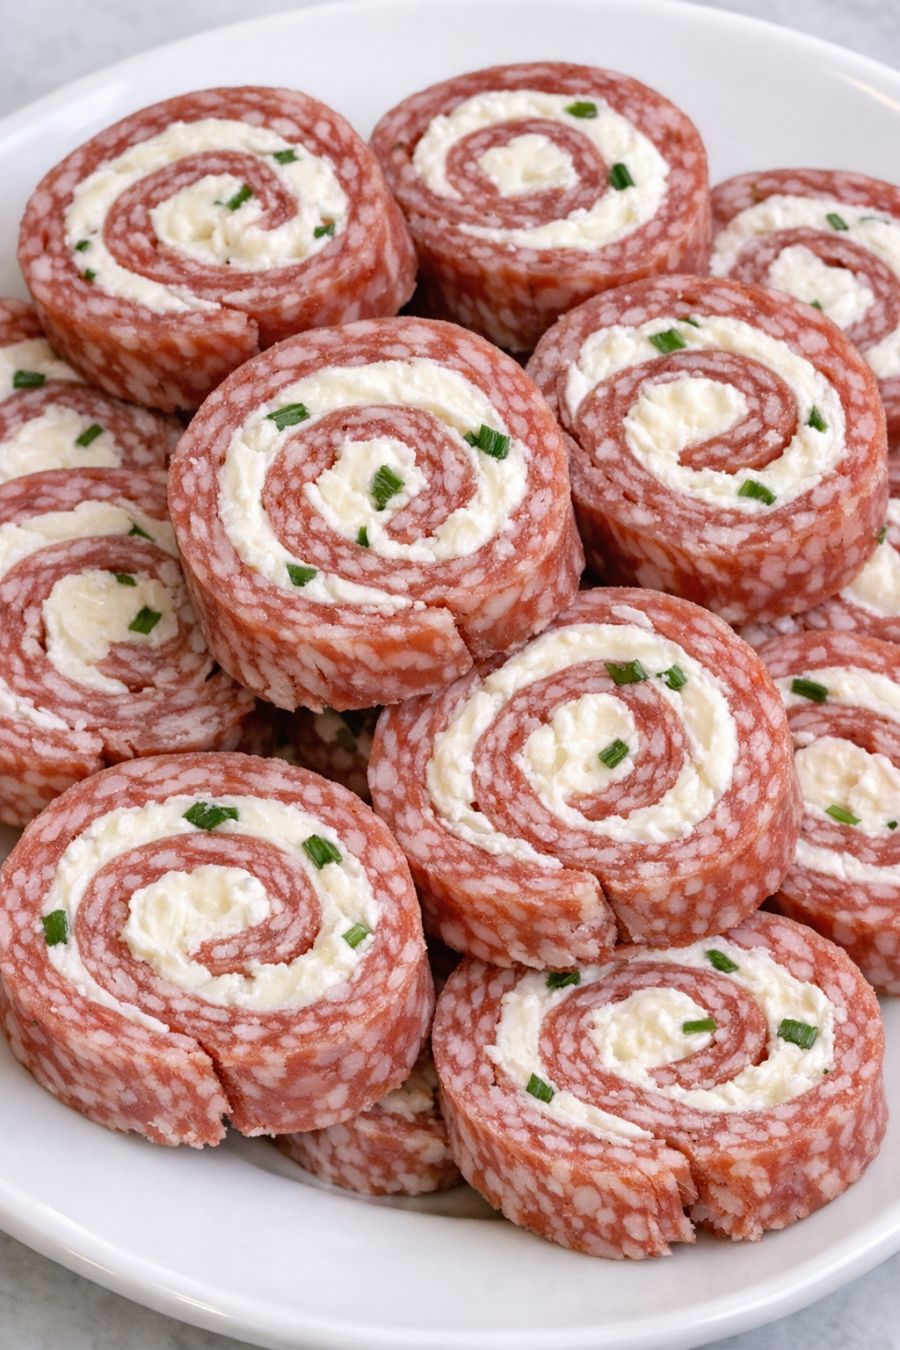
Low Carb Salami Cream Cheese Pinwheels
Servings: 6
Ingredients
24 large thin slices hard salami (about 8 ounces)
6 ounces cream cheese, softened
2 tablespoons finely chopped fresh chives (plus extra for garnish, optional)
Directions
Lay out a large sheet of plastic wrap or parchment paper on your counter. Arrange 8 slices of salami in a tight rectangle, slightly overlapping each slice so there are no big gaps. You’ll repeat this two more times for a total of 3 rolls.
In a small bowl, stir the softened cream cheese until smooth and spreadable. If it’s still stiff, let it sit at room temperature for another 5–10 minutes so it doesn’t tear the salami.
Spread a thin, even layer of cream cheese over the arranged salami, leaving a tiny border (about 1/4 inch) around the edges so it doesn’t squish out when you roll.
Sprinkle a generous pinch of finely chopped chives evenly over the cream cheese layer. The green flecks should be visible but not piled too high, so the roll stays tight.
Starting with the long edge closest to you, use the plastic wrap or parchment to help you tightly roll the salami and cream cheese into a log, just like a jelly roll. Roll as snugly as you can without squeezing out the filling.
Wrap the log firmly in the plastic wrap or parchment and twist the ends to secure. Repeat the layering, spreading, sprinkling, and rolling process with the remaining salami, cream cheese, and chives to make 3 total logs.
Place the wrapped logs in the refrigerator for at least 30 minutes, or up to 24 hours, to chill and firm up. This makes them much easier to slice cleanly and helps the flavors meld.
When ready to serve, unwrap one log at a time. Using a sharp knife, slice into 1/2-inch thick pinwheels, wiping the knife with a damp paper towel as needed to keep the edges neat.
Arrange the pinwheels in a tight, slightly overlapping circular pattern on a white plate so the red salami spirals and white cream cheese centers with green chives are visible. If you like, sprinkle a few extra chopped chives over the top for color and serve immediately.
Variations & Tips
You can tweak these pinwheels a bit while still keeping them low carb and simple. For extra flavor, mix a pinch of garlic powder, onion powder, or Italian seasoning into the softened cream cheese before spreading. If you want a little heat, add a small amount of crushed red pepper flakes or finely minced jalapeño to the cream cheese. For a slightly different look, use peppered salami or a mix of salami and pepperoni slices. To make them ahead for a party, keep the rolls whole, tightly wrapped, in the fridge for up to 24 hours and slice right before serving so the edges stay fresh and moist. Food safety tips: Keep the salami and cream cheese refrigerated until you’re ready to assemble, and don’t leave the finished pinwheels out at room temperature for more than 2 hours (or 1 hour if it’s very warm). Use clean utensils and a clean cutting board, and wash your hands before handling the ingredients since this is a no-cook recipe. If you’re transporting them, pack them in a chilled container with an ice pack to keep them at a safe temperature.
