This 3-ingredient vintage oven chicken using raw drumsticks is the kind of weeknight dinner our mothers and grandmothers leaned on: minimal fuss, pantry staples, and a deeply savory glaze that tastes like you worked much harder than you did. The method is wonderfully straightforward—raw drumsticks go straight into a ceramic baking dish, get coated in a thick, amber-colored mixture made from just two common pantry staples, and roast until the skin is bronzed and sticky. It has that retro, casserole-era charm but fits right into a modern spring evening when you want the oven to do the work and still serve something that has everyone reaching for seconds.
These glazed drumsticks are lovely with simple spring sides: roasted or steamed asparagus, a crisp green salad with lemony vinaigrette, or buttered peas all play well with the sweet-savory glaze. A side of rice, buttered egg noodles, or mashed potatoes will happily soak up the extra sauce from the baking dish. If you like a little contrast, add something bright and crunchy—shaved fennel or radishes tossed with olive oil and vinegar—and offer a wedge of lemon at the table to squeeze over the chicken right before serving.
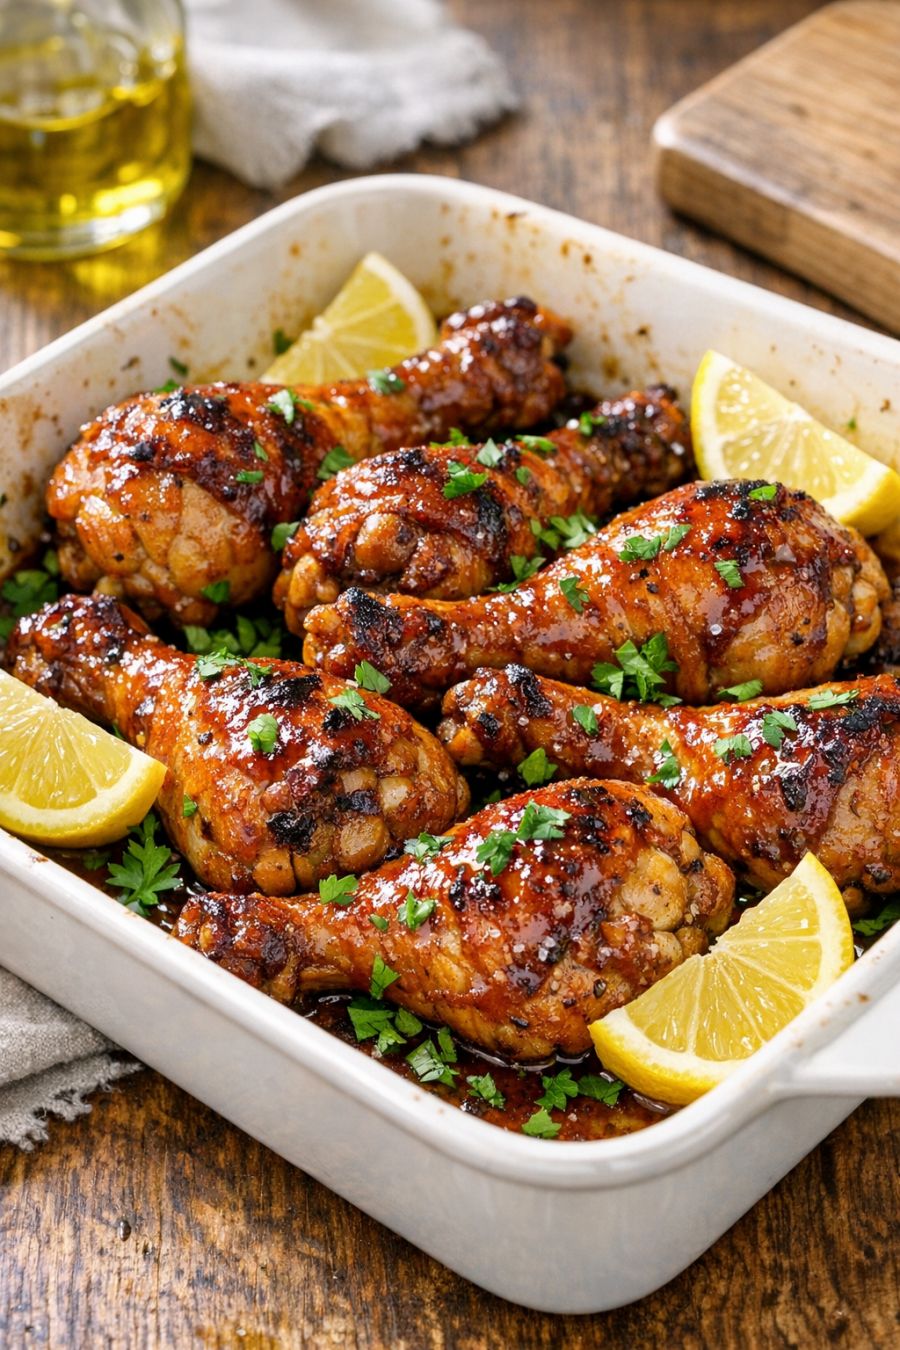
3-Ingredient Vintage Oven Chicken Drumsticks
Servings: 4
Ingredients
2 1/2 pounds raw chicken drumsticks (about 8–10 pieces), patted dry
1/2 cup ketchup
1/4 cup soy sauce (regular or low-sodium)
Directions
Preheat your oven to 375°F (190°C). Place a dark or medium-colored ceramic baking dish (about 9x13 inches) on the counter so it’s ready for the chicken.
In a small bowl, whisk together the ketchup and soy sauce until completely smooth and glossy. The mixture should be thick, pourable, and a deep amber-red color.
Pat the raw chicken drumsticks dry with paper towels; this helps the glaze cling and the skin roast rather than steam.
Arrange the drumsticks in a single layer in the ceramic baking dish, leaving a little space between each piece so heat can circulate.
Pour the ketchup–soy mixture over the drumsticks. Use a spoon or your hands to turn and coat each piece thoroughly until every drumstick is evenly covered in a thick, vibrant amber glaze, with no bare spots.
Slide the baking dish into the preheated oven and bake for 25 minutes without disturbing the chicken, allowing the glaze to start setting and the skin to begin browning.
After 25 minutes, carefully remove the dish from the oven and use a spoon to baste the drumsticks with the pan juices and glaze, turning them once so they cook evenly on all sides.
Return the dish to the oven and continue baking for another 20–25 minutes, or until the chicken is cooked through (an instant-read thermometer should register 165°F/74°C at the thickest part, not touching bone) and the glaze is thickened, shiny, and lightly caramelized around the edges of the dish.
If you’d like a bit more color, turn the oven to broil for 2–3 minutes at the end, watching closely so the glaze deepens to a rich amber without burning.
Remove the baking dish from the oven and let the drumsticks rest for 5–10 minutes. Spoon some of the thickened glaze from the bottom of the dish over the top of the chicken just before serving.
Variations & Tips
For a slightly sweeter, more nostalgic flavor, stir 1–2 tablespoons of brown sugar or honey into the ketchup–soy mixture; this will give you a stickier, more caramel-like finish. If you prefer a bit of heat, add a pinch of red pepper flakes or a few dashes of hot sauce to the glaze while keeping the ingredient list essentially pantry-based. You can also swap regular soy sauce for low-sodium if you’re watching salt, or use a gluten-free tamari to accommodate dietary needs. For very large drumsticks, increase the total bake time by 5–10 minutes, checking for doneness with a thermometer rather than by color alone. Leftovers reheat well in a low oven, covered, with a splash of water to loosen the glaze, or can be shredded off the bone and tucked into sandwiches or salads for an easy next-day lunch.
