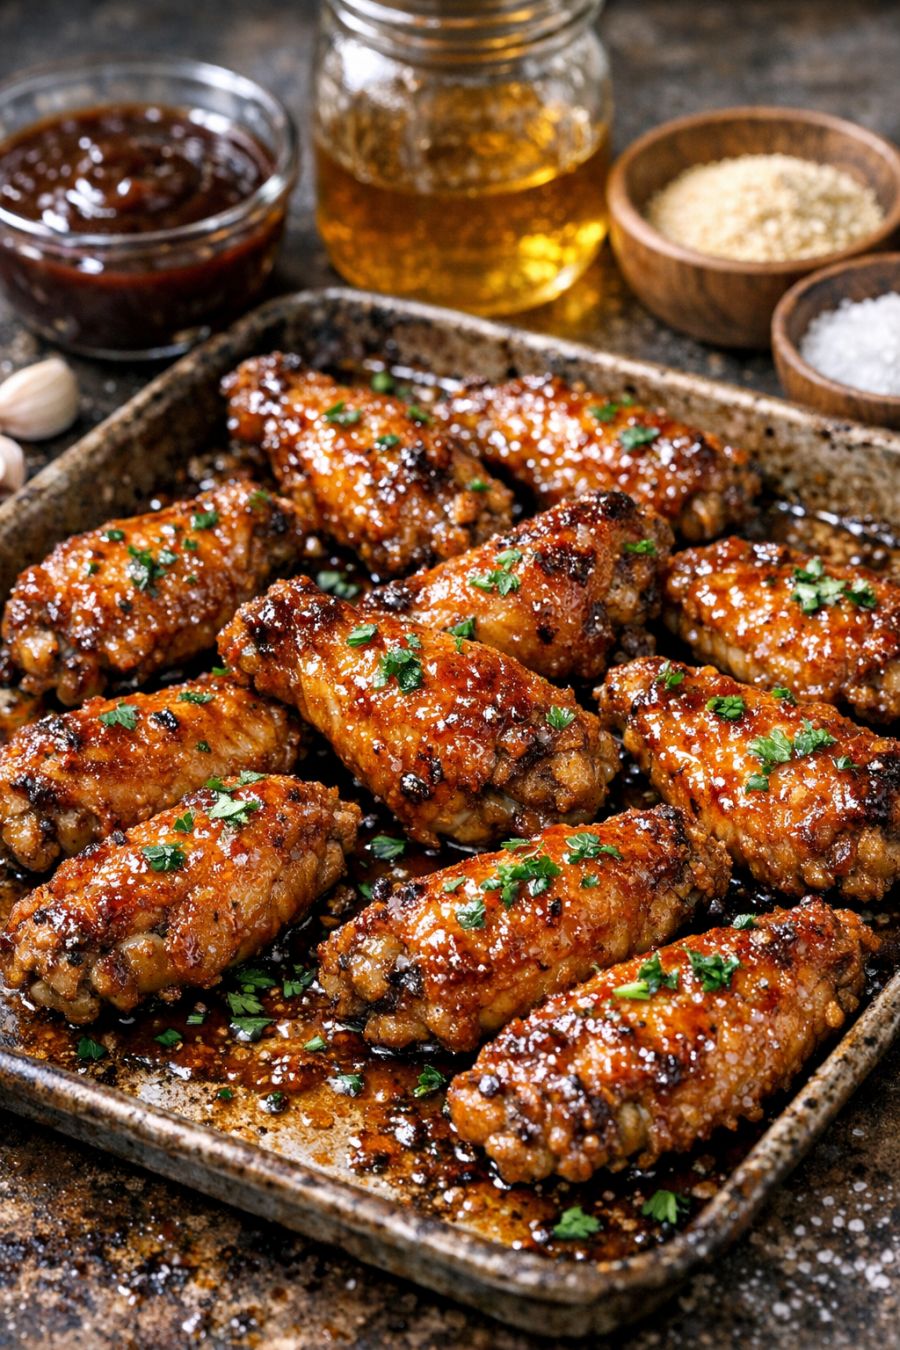
This is my go-to, no-brainer weeknight dinner: you literally dump a bag of frozen chicken wings onto a baking sheet, whisk together three pantry staples, and let the oven do all the work. No thawing, no marinating, no babysitting a skillet. The thick, glossy amber glaze clings to the wings and caramelizes in the oven, giving you that sticky-sweet, savory flavor that tastes like way more effort than it actually was. It’s the kind of meal that makes your husband (or honestly, anyone at your table) ask if there are more wings hiding in the kitchen.
Serve these sticky oven wings straight off the sheet pan with celery and carrot sticks and a side of ranch or blue cheese dressing if you like dipping. For a more complete dinner, pair them with roasted potatoes or a bagged salad mix you can toss together while the wings bake. They’re also great with buttered corn, coleslaw, or over a simple pot of white rice to soak up the extra glaze. If you’re hosting game night, set the pan out with toothpicks and let everyone help themselves.
4-Ingredient Oven Chicken Wings (From Frozen)
Servings: 4
Ingredients
1 (2–3 lb) bag frozen chicken wings (no need to thaw)
1/2 cup barbecue sauce
1/4 cup honey
1 tablespoon soy sauce
Directions
Preheat your oven to 400°F (200°C). Line a heavy-duty aluminum baking sheet with foil for easy cleanup, and lightly grease it with cooking spray or a little oil if you’d like.
Dump the entire bag of frozen chicken wings onto the prepared baking sheet. Spread them into a single layer so they have a bit of space between each piece. It’s okay if some are stuck together; they’ll separate as they bake.
Place the wings in the preheated oven and bake for 25–30 minutes to start thawing and cooking them through. About halfway through this time, use tongs to flip and separate any pieces that are still stuck together.
While the wings are in their first bake, whisk together the barbecue sauce, honey, and soy sauce in a small bowl until smooth and glossy. This is your thick amber glaze.
After the initial 25–30 minutes, carefully pull the baking sheet out of the oven. The wings should be mostly cooked and no longer clumped together. Pour or spoon about half of the glaze over the wings and toss them right on the pan with tongs or a spatula until they’re mostly coated.
Return the pan to the oven and bake for another 10 minutes. This lets the first layer of glaze start to thicken and cling to the wings.
Remove the pan again and spoon or brush on the remaining glaze, turning the wings so they’re well coated and glossy. You’ll see that thick, vibrant amber glaze starting to build up on the wings and the pan.
Bake for an additional 10–15 minutes, or until the wings are deeply browned in spots, the glaze is sticky and slightly caramelized, and the internal temperature of the thickest wing reaches at least 165°F (74°C). If you like them extra charred and sticky, you can broil them on high for 1–3 minutes at the end—just watch closely so they don’t burn.
Let the wings rest on the pan for 5 minutes so the glaze thickens even more, then transfer to a platter and scrape any extra sticky sauce from the pan over the top before serving.
Variations & Tips
If you like heat, stir 1–2 teaspoons of crushed red pepper flakes or hot sauce into the glaze before coating the wings. For a smokier flavor, use a smoky barbecue sauce or add 1/2 teaspoon of smoked paprika. You can swap honey for maple syrup or brown sugar if that’s what you have in your pantry; just keep the same total amount of sweetness so the glaze stays thick. For a slightly tangier wing, add 1–2 teaspoons of apple cider vinegar or a squeeze of lemon juice to the glaze. If you’re feeding a crowd, you can easily double the recipe and use two sheet pans—just rotate them halfway through baking for even browning. To make cleanup even easier on a busy night, line your baking sheet with both foil and parchment; the glaze will peel right off. Leftover wings reheat well in a 375°F oven for about 10 minutes, which helps them crisp back up better than the microwave.
