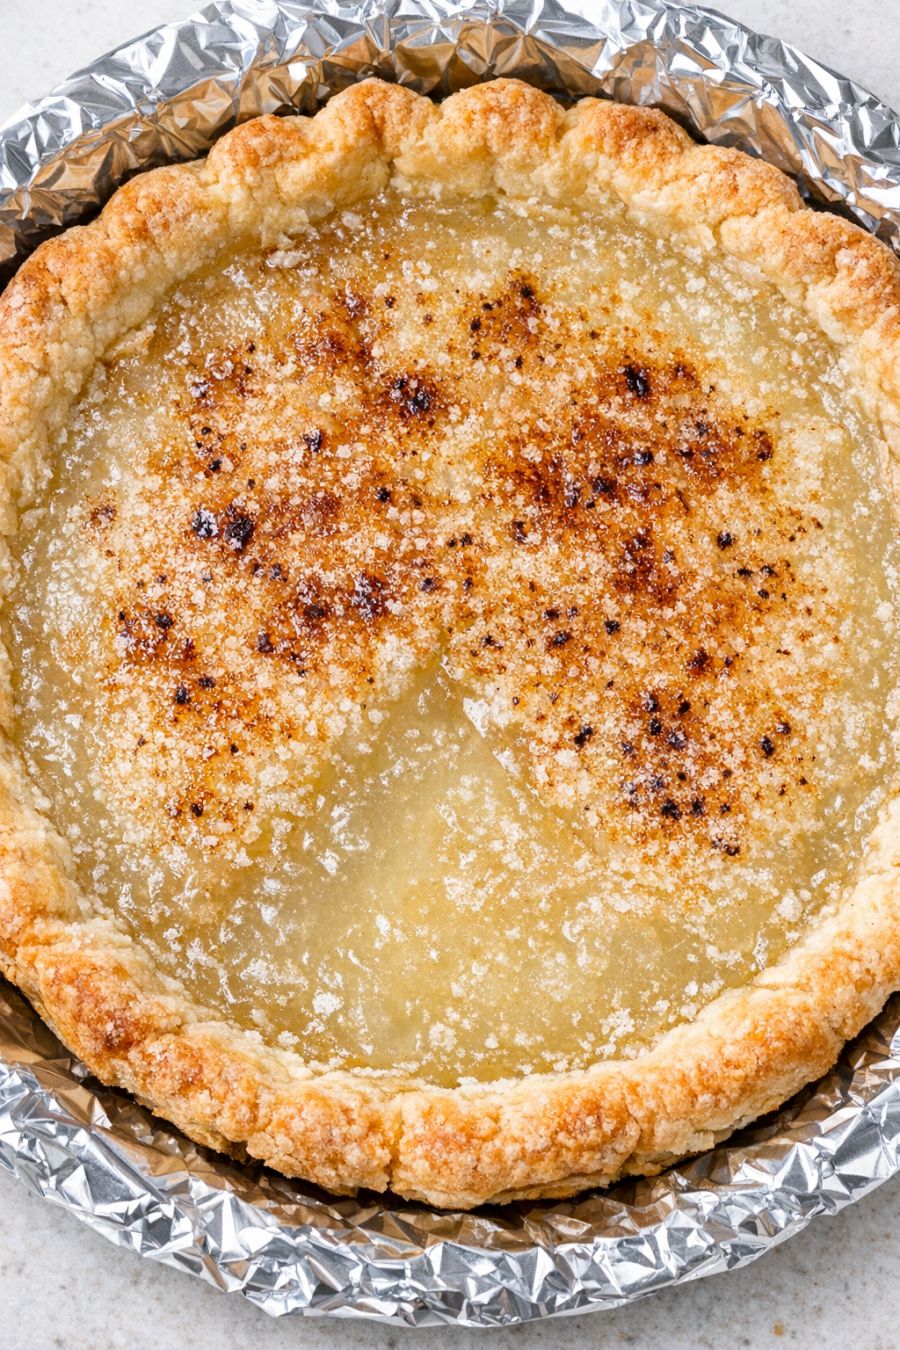
This 4-ingredient water pie is one of those Depression-era desserts that sounds impossible until you taste it. My grandfather remembered his mom making it when money was tight but they still wanted something sweet after Sunday supper. It’s literally made with water, sugar, butter, and flour, baked into a simple pie shell until it turns into a silky, jelly-like filling with a toasted sugar top. It’s humble, budget-friendly, and surprisingly comforting—exactly the kind of dessert you can throw together on a busy weeknight with pantry staples.
Serve this water pie slightly warm or at room temperature so the filling stays soft and jelly-like. It’s lovely on its own with a cup of coffee or tea, or you can add a small dollop of whipped cream or a scoop of vanilla ice cream if you want to dress it up a bit. Because it’s on the sweeter side, I like to pair it with something simple and not too rich for dinner, like roasted chicken and vegetables or a big salad, so the pie can quietly steal the show at the end of the meal.
4-Ingredient Water Pie
Servings: 8
Ingredients
1 unbaked 9-inch pie crust (store-bought or homemade, chilled in pan)
2 cups hot tap water
1 cup granulated sugar
1/4 cup all-purpose flour
5 tablespoons unsalted butter, cut into small pieces
Directions
Preheat your oven to 400°F (200°C). Place the unbaked 9-inch pie crust on a baking sheet lined with foil to catch any drips and to make it easy to move in and out of the oven.
In a medium bowl or large measuring cup, whisk together the hot water, granulated sugar, and all-purpose flour until the mixture is mostly smooth. A few small flour bits are okay; they’ll bake out.
Carefully pour the water mixture into the unbaked pie crust. It will look very thin and almost wrong—that’s exactly how it’s supposed to look at this stage.
Dot the top of the liquid filling evenly with the pieces of unsalted butter. As it bakes, the butter will melt and rise, helping create that translucent, jelly-like center and toasted sugar top.
Place the baking sheet with the pie on the center rack of the oven. Bake at 400°F (200°C) for 25 minutes, then, without opening the oven, reduce the temperature to 350°F (175°C) and continue baking for 25–30 more minutes.
The pie is done when the crust is golden and flaky, the top looks lightly toasted with patches of caramelized sugar, and the center jiggles like firm jelly when you gently nudge the pan. If the edges brown too quickly, loosely tent them with foil during the last 10–15 minutes.
Remove the pie from the oven and let it cool completely on a wire rack. The filling will continue to set as it cools, going from very wobbly to a sliceable, translucent, buttery jelly texture.
Once cooled, transfer the pie (still in its pan) to a tin foil–lined serving platter if you like that old-fashioned, pass-the-pan-at-the-table feel. Slice with a sharp knife, wiping the blade between cuts for neat slices. Store leftovers covered at room temperature for up to 1 day or in the refrigerator for up to 3 days.
Variations & Tips
Because this recipe comes from a time when kitchens were stocked with the bare minimum, the base version sticks to just four core ingredients plus a pie crust. If you want to stay close to the original but tweak it a bit, you can swap part of the granulated sugar for light brown sugar for a slightly deeper, caramel note and a darker toasted top. A tiny pinch of salt (not counted as an official ingredient) in the water mixture balances the sweetness without changing the spirit of the recipe. For a subtle flavor twist, add a splash of vanilla or a pinch of cinnamon to the water mixture, knowing that you’re nudging it away from the strict Depression-era simplicity. If you need to keep things dairy-free, use a dairy-free pie crust and swap the butter for a plant-based butter that’s firm and not too soft at room temperature. For busy days, you can assemble the pie in the morning, keep it chilled (unbaked) for up to a couple of hours, then bake it right before dinner so it’s just slightly warm by dessert time. And if your crust tends to get soggy, blind-bake it for 8–10 minutes first, let it cool slightly, then add the filling and bake as directed, watching the edges so they don’t over-brown.
